We have created the Data Importer to allow you to easily add your members to the iKnow system. The data will usually be exported to a spreadsheet file, you will need to ensure that the file is in .csv format so that it can be imported into iKnow.
Some tips for when you are creating your CSV file
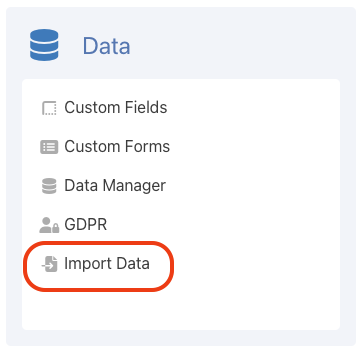
To access the Data Importer in iKnow, you will need to go to Settings and click Import Data.
To begin importing your data, you will need to click the Select CSV file button and select the correct file from your computer hard drive.
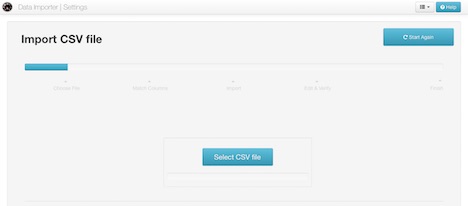
Once the file has uploaded, you can begin the data verification process, that will ensure that the data imported to iKnow is correct. You should see a screen similar to the following, if what you see is a lot of random characters, please check that the file you are attempting to import is in the correct format. The file must be in .csv format. Files in .xls or .xlsx format cannot be uploaded (you should be able to export a CSV file from Excel).
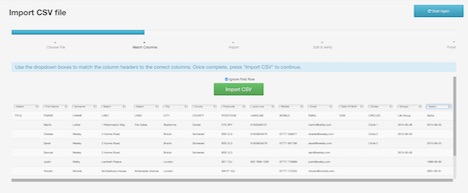
You now need to verify the data that iKnow will import.
If your CSV file has a header row that labels all the columns, i.e. First Name, Last Name, etc., you will need to tick the Ignore First Row box above the Import CSV button.

You will then need to check that the headers that iKnow has ‘guessed’ are correct. iKnow will attempt to correctly assign the right headers according to the content of the columns. There will be times that this is not possible, or that the system gets it wrong, there may also be some columns you don’t wish to include. You can make sure iKnow knows what is in each column, and which it should ignore, using the dropdown menus at the top of each column.
If you want iKnow to ignore a column, you will need to choose Select from the dropdown, like the TITLE column in the image below. If iKnow can’t work out what the contents of the column is, it will leave the dropdown on Select, like LINE1 and LINE2 in the image, and you will need to change it to the correct header option.

Sometimes iKnow will select a header, but get it wrong, so you will need to change it. In the image below, iKnow has selected Groups as a header, but this is actually a Journey column, so this will need to be changed.

Once you are happy that all your column headings are correct, click the Import CSV button.
When the import is complete you will then need to verify the data that has been imported from your CSV file.
You will see a screen with 6 tabs; Campuses, Groups, Teams, Journeys, Circles and People. You will need to check the information in each tab, and confirm each tab, before you can complete the import process.
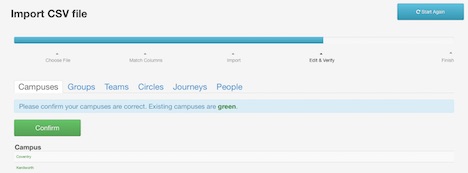
The Campuses tab will show any campuses that are already in iKnow in Green. Any new campuses, i.e. campuses that are in the CSV file but not already in iKnow, will be in an editable text box so you are able to make any corrections necessary. If the details are correct, click Confirm. The first time you click Confirm you will receive the following warning. Once a tab has been confirmed you cannot go back to it.

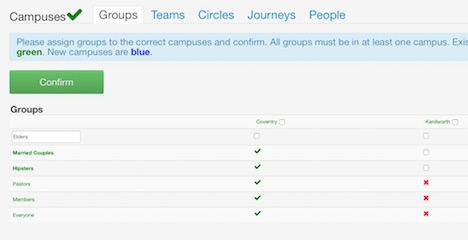
All groups must be assigned to a Campus. Groups already in iKnow and assigned to campuses can’t be changed. You will need to select a campus for any new groups by checking the relevant checkboxes below the campus names. You can add all available groups to a campus by checking the checkbox next to the campus name. Confirming Teams and Circles is done in exactly the same way.
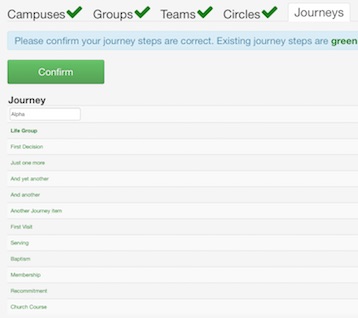
Journey items that already exist in iKnow will be listed for you. Any new Journey items that are introduced in the CSV file will be listed in editable text boxes so that any changes that may be needed can be made.
The People tab gives you the opportunity to make changes to personal details, as well as add any that may not have been included on the CSV file. Any people that are already in your iKnow system will be shown in green and cannot be changed.
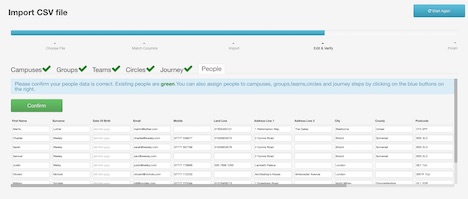
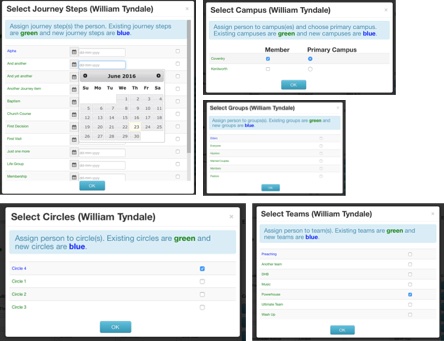
Also, in the People tab, you are able to check that people have been assigned to the correct Campuses, Groups, Teams, Circles and Journey Steps.
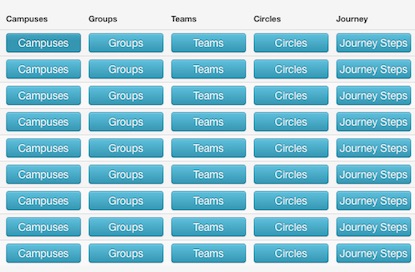
Simply click the relevant button alongside the person’s name and you will be able to check that the correct information is shown, and change it if necessary.
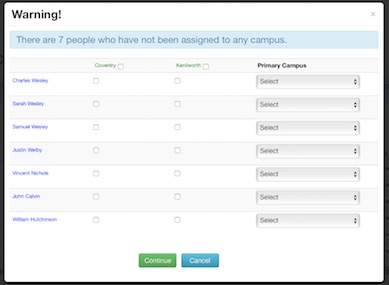
If there are any people that have not been assigned campuses when you confirm the People data, you will receive a warning that lists all those with no campus and gives the opportunity to assign them a campus. To add everyone in the list to the same campus, simply check the checkbox next to the campus name. If people are added to more than one campus, you will need to make sure they have been assigned to the correct Primary Campus. If only one campus is selected, this will automatically become their Primary Campus.
Once you have confirmed all your data, you are ready to complete the import process and add your people to your iKnow database. To do this, just click the Process button.

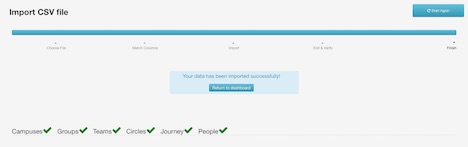
Depending on the size of the file you are importing, this may take some time to complete. When the import is complete you will receive a message to on screen to let you know that your data has been imported. You can then return to your iKnow dashboard.